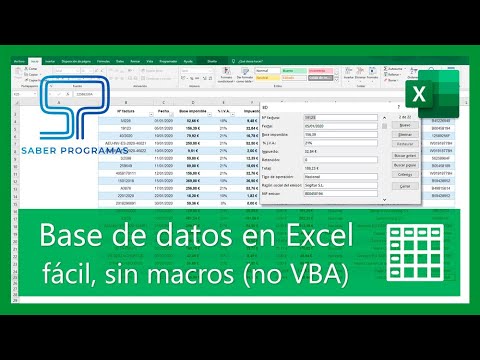
Hello everyone! Welcome to knowing programs in this tutorial we will see how to create a database in Excel in an efficient way and without using macros we will see how to add records easily through the emerging window of the form and we will also see how to perform searches using one or several criteria to easily find the record you need in your database if you like our tutorials do not forget to subscribe to our channel and click on the bell to be Uploading to create the database we start from a blank sheet in Excel where we only have the headers of our database, in the example we will see how to create a database of invoices received so that the headers that I have placed correspond to the fields that I want to record of the invoices that we are receiving to create the database easily and without using macros we will use the tool for tool for Excel forms,
By default it does not appear in the tools so we are going to add it we are going to file - options and in this window that opens we can add the tool form either in the rapid access tools that is this bar that we have here in the upper area or we can customize the ribbon that are all these in my case I will customize the tape Element of this area click the form of the form and we only have to go looking until we find it here we have the option we will add it to the start tab, which is what we are currently by clicking on adding and we see that it tells us that we need to add it to a personalized group then we will add first a group here in the lower part we click on a new group and we will change the name we will give it the name we can even assign an icon. In accept and once we have it selected here and here on the left side it has selected the form we can click on add and we see that it has been added correctly we will see that as soon as I click OK will appear here on the right side we accept and we see how the form option now appears to be able to work better with our database we will create an excellent table we click on any of the cells that contains the text of the header we are going to insert This window this is the head
We can change the style simply and choosing any of those who appear here to enter the data in our database with the form we only have to click with the mouse on any of the cells of our form we are going to the start tab we already know that we have here the option of form we click on the form and all the fields would appear to fill out but before we want to automate some fields with formulas so that you It would be automatically filled and they would not appear to fill we want that in the date column a short date format in the tax base we want to show us a currency format in the VAT section we want to show a percentage in the tax section we want to automatically calculate it. The currency format is applied, the retention will also have a currency format in the total we will calculate so that it is equal to the tax base plus the tax less the retention if we have applied Puls we enter into type of operation we will introduce a text so we change the type of cell to text to text by corporate reason of the sender we will also introduce text and the NIF of the issuer we will leave it in general since we are going to enter both texts and data to enter. The first record of this database we only have to place the mouse on any of the cells can even be in the header and in the start tab we go to the form tool that we have added previous we click on the form and we see that the fields to fill up will appear we will start entering our records The first thing we must introduce is the invoice number
To move on to the next data we can click with the mouse or we can also press the tab key we introduce the date the tax base the VAT percentage that in this case is 21% we introduce it as 0 21 since the cell already has the percentage format in retention or we will introduce anything because there is no retention to this case if it is a national operation and finally it once we have introduced the data of the first record are simply press To our data table here the date is not shown because the field is too narrow we double click here at the top and we can already correctly view the date of the entrance to add a new entry we must place in a cell cell and click on the form we see that if we place the mouse cursor in any of the cells where we do not have our data and we click on the form that external Excel Table because it seems much more comfortable to me and I already made a tutorial on this that I will leave here the upper right although the form works perfectly in the cells of cells we will add a new record so we place ourselves in any of the cells we click on the form we click new since in this case the first one that we have introduced appears we see the blank fields and we only have to fill out once we have it to enter again. Press enter we see that we do not have to fill in the tax or the total because these fields are automatically filled by means of Pulsas Enter and we see that our record is added correctly in this case we will align all these data to the center and we will continue to insert data to see the search options once we have entered some records in our database
We can continue seeing the functionalities of the form tool to open it because we click on any cell of our database we click on the form and we see that the first record appears we have in total 22 introduced when you are working with your database you will surely end up accumulating many more records we can move between the different records using the lateral displacement bar we can click here on the bottom and we see how we move The next tool that we find is to eliminate if we go, for example, to the first record and click on deleting this emerging window that tells us that the record presented will be permanently eliminated if we click on Accept when we close the form and return to our database we will not have the option of reversing this action with control z so that when you eliminate from this area you must be totally sure that you must eliminate that file we will cancel the next option that appears in this case is Disableted that is because it is activated when we make some change in one of the records, for example, in this case, which is the number 11 that is this that appears here for example, we change the tax base we see that we have already activated the restore button this is to leave the record as it was at the beginning and not apply the changes we have made if we click on Restore We see that again we return the tax base that we had previously Database by clicking on criteria we are all the data that we enter in our database we can search not only for the data that we enter manually but also by the data that are entered through formulas such as the tax and the total in this database that we have created we can perform searches for numerical values for example we could perform the search for a record that has been made with the date of January 10 we would write the date we will that effectively is January 10, if we click on Search Next, it shows us the following record with this date that would be on the 4th of 22 if we click again to search next show us again the record 5 that also has a date of January 10 and if we click again, seek to search the next
By clicking on this button of criteria and forms we can return to the form area to fill and see the two records or the area of criteria as we are now to perform searches when we perform searches for numerical values whether they are dates or in this case amounts such as the tax base we can use the symbols of equal greater than and less than for example if we wanted to look Values that meet that requirement that we have established in this case we would have two click on criteria we delete this we formulate again and click again criteria we can also searches with more than one criterion for example we can look exactly this entry in which we see that there are 1200 euros of taxable base we could look February 2020 Once we have both criteria we click on looking next and the entry that appears to us is this one that we were looking for from February 2 in this case there is no more coincident but if there were no there as you would also show it to us you can also make searches by text so that when you see If we wanted to look
We can use an asterisk to search for all the records that contain the word Amazon but that can then contain more text we click on the next and the first record appears 19 we click on Search Previous appears on 15 on 5 in 5 and on 4 these are all the records that contain Amazon so for example we know the final part of the text that we want to look for we can also use the asterisk at the beginning. This record is not found that has a text and then the word system if we do not seek next or seek previous does not show us any other record because this is the only coincident one and when we look for a text but we do not know if it is written correctly for example we look here Mariah so that this pencil record is not found at the bottom but we do not write Maria with the tilde as it appears here and we click Previously with another criteria then we have to return to criteria and here where the and written we will replace it with an interrogation since we do not know how that character is written and now if we click on looking next and we see that the text Maria Cuenca is not found without any problem if we do again click on Search next to see of extensive data and you want to extract a series of data based on one or more criteria in this case what you can do is use the advanced filters. We have here you can create our totally personalized database I hope it has been useful if so, I like and subscribe to our channel to be up to date with all the news that you will find additional information on our website